August 2005: Let the rebuilding begin!
I could not wait to get back from the 2005 RC Heli World Championships to start rebuilding CIR.
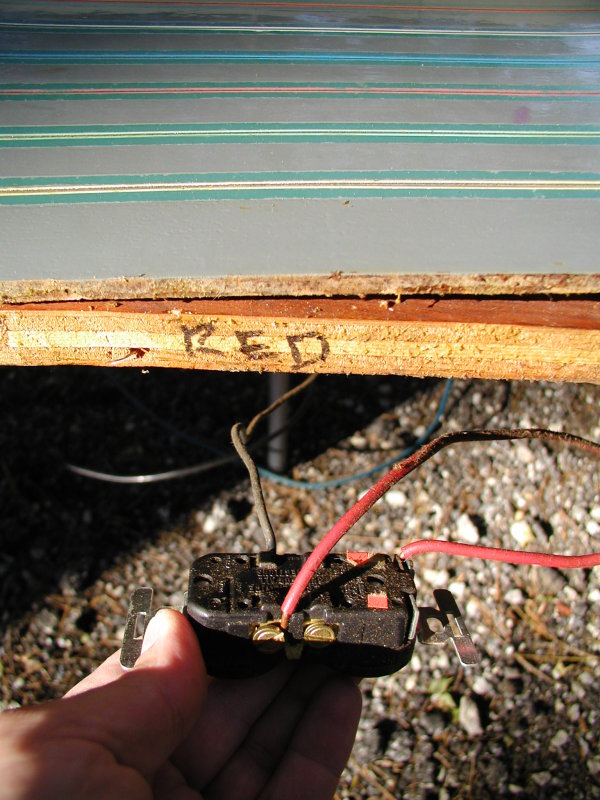
My first step was to strip the track of basically everything that was not wood. Carpet, plastic inside rails, all wiring, and the most difficult thing to remove, the copper tape!
Not quite sure what Terry used to glue this down, but it was nearly down forever! After several methods were tried, the one that worked was to heat the copper tape to "finger burning" temperature, then pull the tape off the track. The tape came off well with this method, but the glue remained.
Below are some photos of CIR as it was being stripped of its original wiring:


Sanding the Grey Monster!
Once all of the wiring, carpet, and copper wire was removed, it was now time to sand the track surface until it was silky smooth.
This would prove to be a challenge as the now 20 year old, 2 part epoxy floor paint proved to be as hard as a rock! Using my trusty B&D "Mouse" sander, and what seemed to be hundereds of sheets of paper, I proceeded to spend several weekends sanding. While the paint was hard as nails (a good thing as it would give a great base) the glue remaining from the copper tape proved to clog the sandpaper rather quickly.
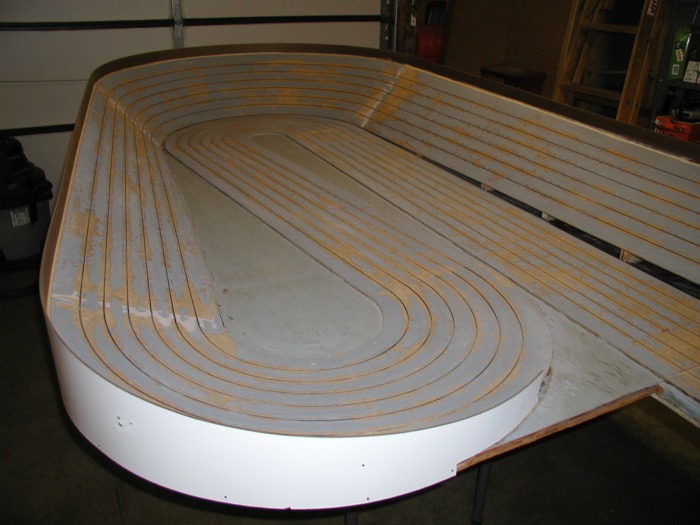
Once the sanding of the racing surface was complete, next on the list was to add additional roadway supports when needed to remove some settling between the original track angle blocks. Once this was complete, the next step was to fill and sand the joints and seems with auto body filler until the track was as smooth as possible.
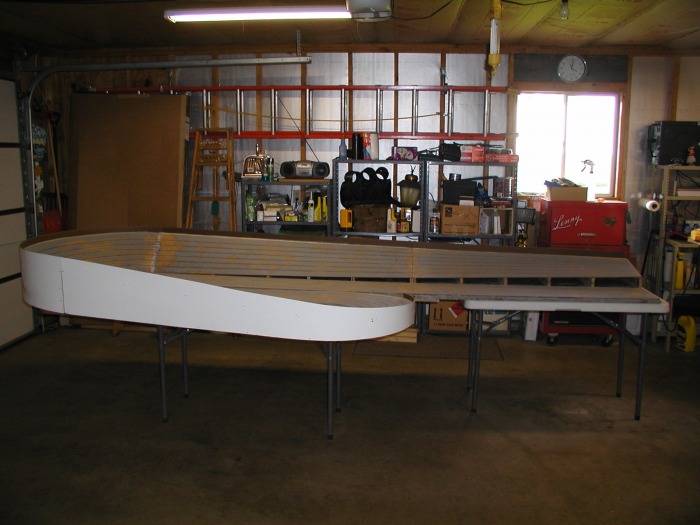
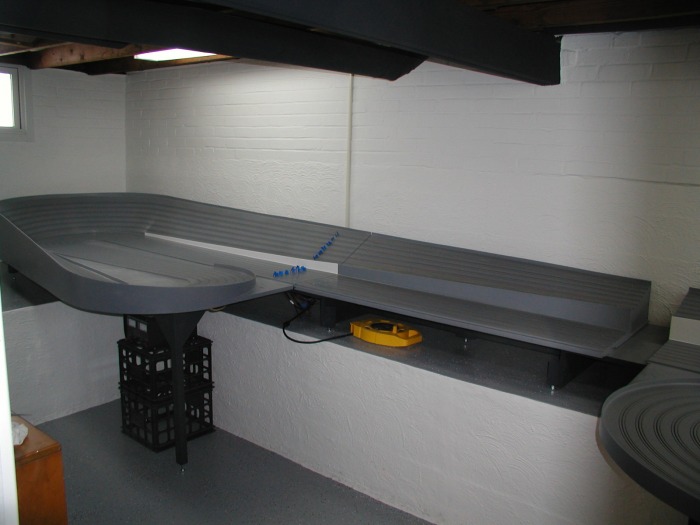
Next, the sides of the track, both inside and outside where needed, were sheeted in with 1/8" moisture resistant pressboard. I choose this as it had a great finish on the outside, was very flexible to conform to the track shape, and was a similar material to the race surface. It would also not add much weight to the track.
This would prove to be a challenge as the now 20 year old, 2 part epoxy floor paint proved to be as hard as a rock! Using my trusty B&D "Mouse" sander, and what seemed to be hundereds of sheets of paper, I proceeded to spend several weekends sanding. While the paint was hard as nails (a good thing as it would give a great base) the glue remaining from the copper tape proved to clog the sandpaper rather quickly.
Once the sanding of the racing surface was complete, next on the list was to add additional roadway supports when needed to remove some settling between the original track angle blocks. Once this was complete, the next step was to fill and sand the joints and seems with auto body filler until the track was as smooth as possible.
Next, the sides of the track, both inside and outside where needed, were sheeted in with 1/8" moisture resistant pressboard. I choose this as it had a great finish on the outside, was very flexible to conform to the track shape, and was a similar material to the race surface. It would also not add much weight to the track.


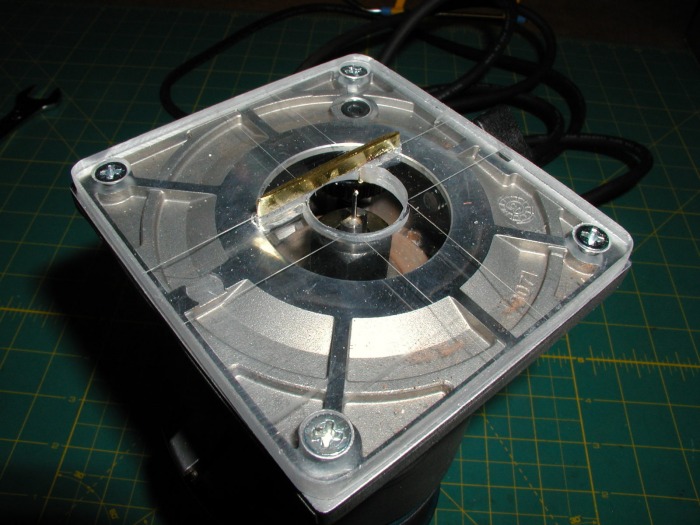
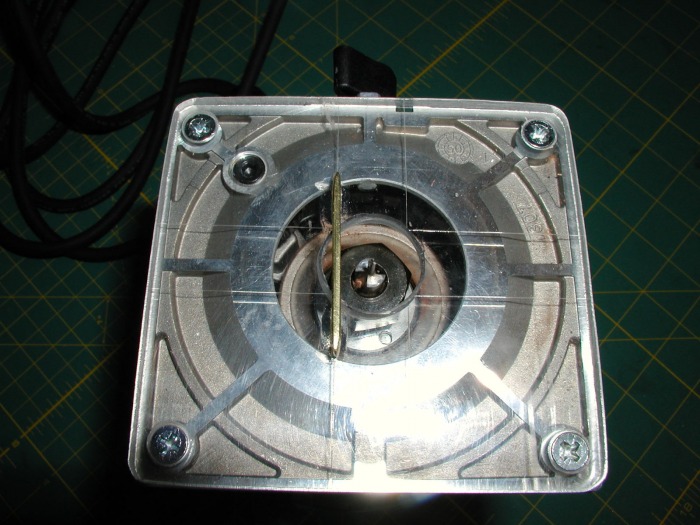
Routing the Rail Pockets: The tools.....and they said it couldn't be done!
The next step would be the toughest part of the rebuild, and could make or break (literally) the track: Rounting the rail pockets.
Before I started, I did considerable research on rail, material, how to put it in, and who knew the most about building tracks in 2005. This research led me to Brad Bowman.
I called Brad and talked to him, he was very helpful, although fairly certain that what I was planning to do could not be done. I talked him into selling me the needed steel track rail, colored lock wire, lock wire installation tool, and his book on how to build a track. I wanted the material so I could do some test routing, and make sure the clearance for the rail would be correct.
I quickly learned that before I could start routing, I would need to spend some time building special jigs for my palm router. Below you will see the photos of the jig I constructed for the palm router. This jig was designed to run in the existing guide slot. I would go counter clockwise around the track to route 1 rail pocket, then turn and go clockwise around the track to route the second rail pocket. Sounds pretty easy.....well......maybe not!
I was able to router the rail pocket slots with good accuracy on the flat sections of the track, but the banks proved challanging in that the router would elevate in the banks, and the rail pocket depth would be considerably more shallow than needed.
After some head scratching, I came up with the solution: Make a 2nd jig for my 90 degree Dremel attachment with a smaller contact area, and re-router the pockets, following the new pockets this time, to set the correct rail pocket depth. It actually worked!
So, I would route the pockets 3 times at this stage: 1st with the big palm router, and 2 times each with the dremel and 90 degree attachment. After many laps with the router, the pockets were completed!

Let the Painting Begin!
With the rail pockets all routed, and the track surface resanded, it was now time for primer and paint.
I chose to prime the track with an automotive 2 stage epoxy primer, sprayed. This would give the track a nice hard base like the original finish, and would help make the wood track surface moisture resistant.
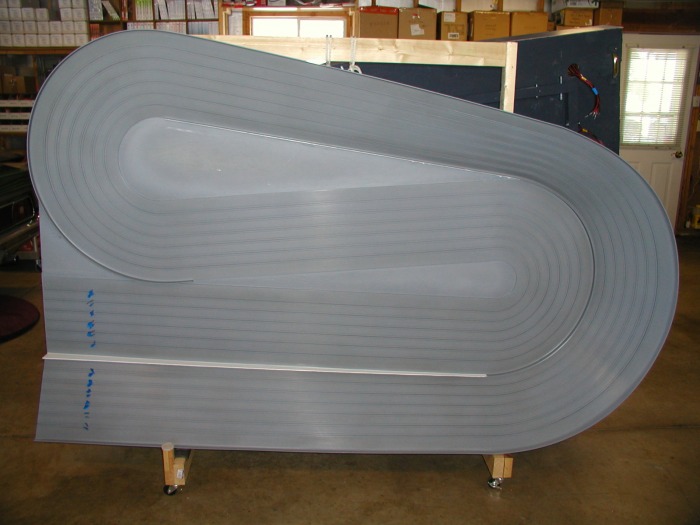
Grey epoxy primer was sprayed in several coats. Once the primer cured, it was hand sanded until it was perfectly smooth again. It was time to paint!
The paint selected was automotive 2 stage (basecoat/clearcoat) Urethane. Grey was chosen, and it was similar in color to the grey primer.
Once the paint dried, it was then hand sanded again. 2 part Urethane Clearcoat with a flattner additive was sprayed on the entire track in several coats. The flattner would remove the high gloss of the urethane clear, and would hopefully reduce any glare when racing.
The final finish was sanded with "scotchbrite" to a nice flat, uniform finish.
I chose to prime the track with an automotive 2 stage epoxy primer, sprayed. This would give the track a nice hard base like the original finish, and would help make the wood track surface moisture resistant.
Grey epoxy primer was sprayed in several coats. Once the primer cured, it was hand sanded until it was perfectly smooth again. It was time to paint!
The paint selected was automotive 2 stage (basecoat/clearcoat) Urethane. Grey was chosen, and it was similar in color to the grey primer.
Once the paint dried, it was then hand sanded again. 2 part Urethane Clearcoat with a flattner additive was sprayed on the entire track in several coats. The flattner would remove the high gloss of the urethane clear, and would hopefully reduce any glare when racing.
The final finish was sanded with "scotchbrite" to a nice flat, uniform finish.

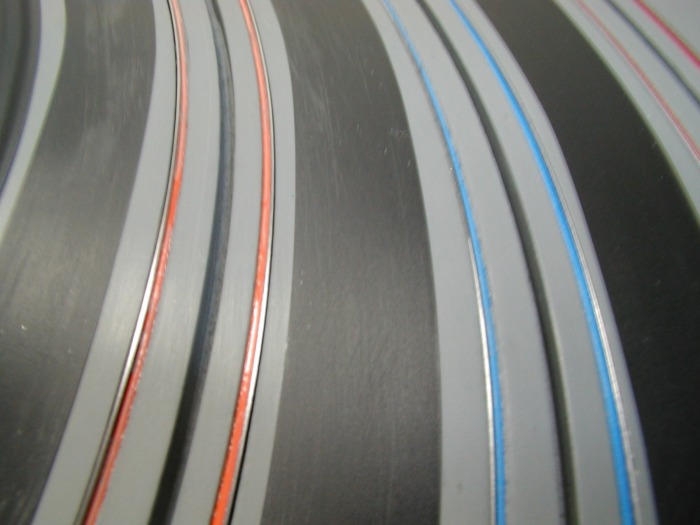
Let the Railing Begin!....does anyone know how to rail a tr
Now that all the sanding, routing, priming, and painting is done, its now time to rail the track.
Since I knew I did not know what I was really doing (the 1st step of any recovery), I dedided to start railing the 4' straight 1st. Its short, straight, likely the easiest place to start.
I started railing the 1st rail using "Gorilla" glue.....do not do this! This was my 1st experience with this glue, and I did not realize it EXPANDS when drying! Luckily, the track paint was impervious to most solvents, so I was able to clean up the mess. Now I need to find a better glue.
I ended up finding a glue called "BOND 527". Its a clear cement like adhesive, designed to stick to metal, wood, etc, sounds like the trick! It actually worked quite well as it had a thin applicator tip on each tube, worked perfect for getting the glue in the rail pockets, and not all over the track! After 5 years, its still holding perfectly, not 1 rail has moved, even though the track has gone through 1 relocation.
Once I railed the center section, I decided I would rail 1 lane all the way around 1st, then assemble and test the track. Logic here was I would rather only have to redo 1 lane if I did it incorrectly, rather than all 6.
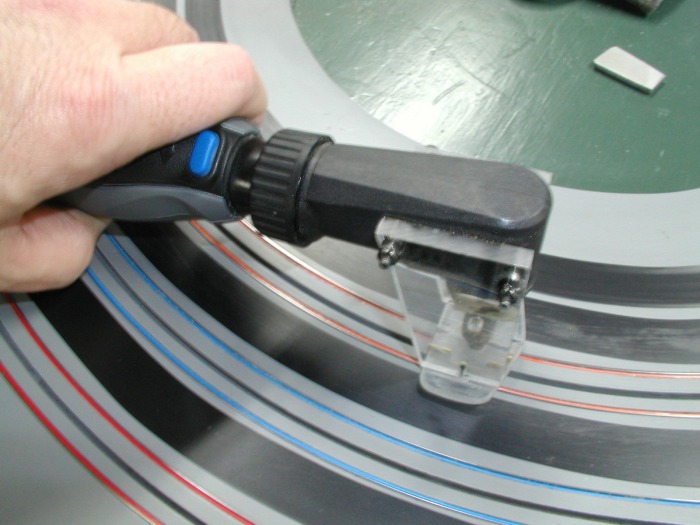
Railing of the 1st lane went well with the exception of the bank turns. The rail would simply not flex enough to go all the way to the bottom of the rail pockets. Solution: Make a 3rd and final jig, and "plain" the rails in the bank and other areas for a perfect height! It worked! Here are photos of the rail "Plaining" process:
Since I knew I did not know what I was really doing (the 1st step of any recovery), I dedided to start railing the 4' straight 1st. Its short, straight, likely the easiest place to start.
I started railing the 1st rail using "Gorilla" glue.....do not do this! This was my 1st experience with this glue, and I did not realize it EXPANDS when drying! Luckily, the track paint was impervious to most solvents, so I was able to clean up the mess. Now I need to find a better glue.
I ended up finding a glue called "BOND 527". Its a clear cement like adhesive, designed to stick to metal, wood, etc, sounds like the trick! It actually worked quite well as it had a thin applicator tip on each tube, worked perfect for getting the glue in the rail pockets, and not all over the track! After 5 years, its still holding perfectly, not 1 rail has moved, even though the track has gone through 1 relocation.
Once I railed the center section, I decided I would rail 1 lane all the way around 1st, then assemble and test the track. Logic here was I would rather only have to redo 1 lane if I did it incorrectly, rather than all 6.
Railing of the 1st lane went well with the exception of the bank turns. The rail would simply not flex enough to go all the way to the bottom of the rail pockets. Solution: Make a 3rd and final jig, and "plain" the rails in the bank and other areas for a perfect height! It worked! Here are photos of the rail "Plaining" process:

It Works!!!! Sabatona is Born!
The 1st Lane (Yellow) was railed and tested. It actually works!!!! After about 2 weeks of racing on the 1 lane every night, it was now time to disassemble the track and rail the other 5 lanes.Bummer........but it had to be done.
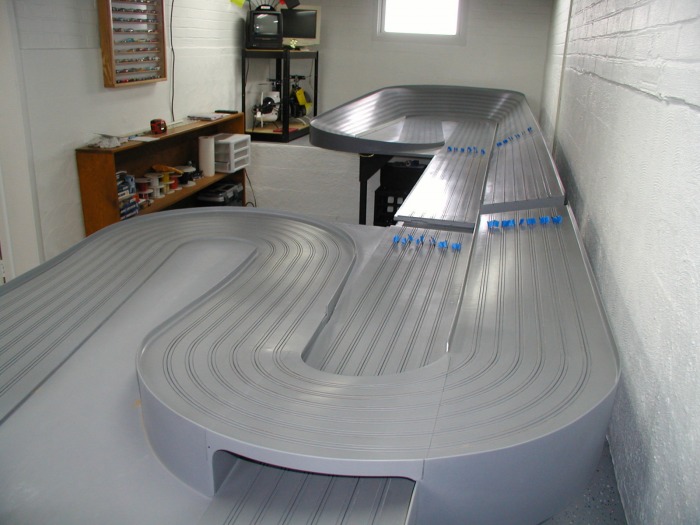
With all 6 lanes now railed, plained, dressed, and the track pieces reassembled, the track was ready for its 1st runs on all lanes!
With all 6 lanes now railed, plained, dressed, and the track pieces reassembled, the track was ready for its 1st runs on all lanes!
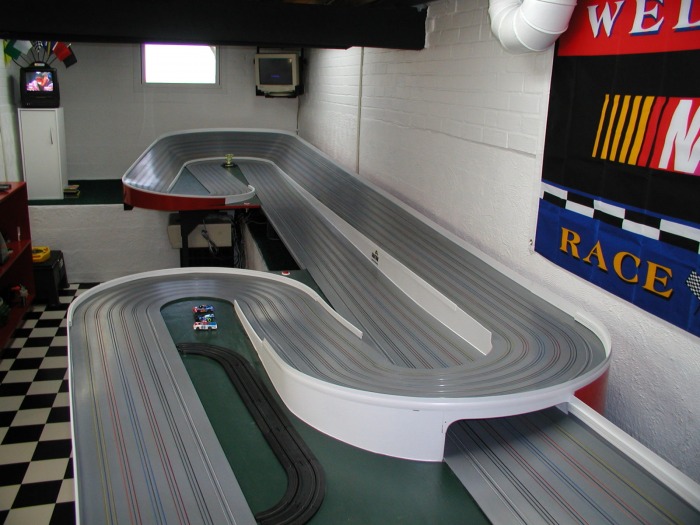
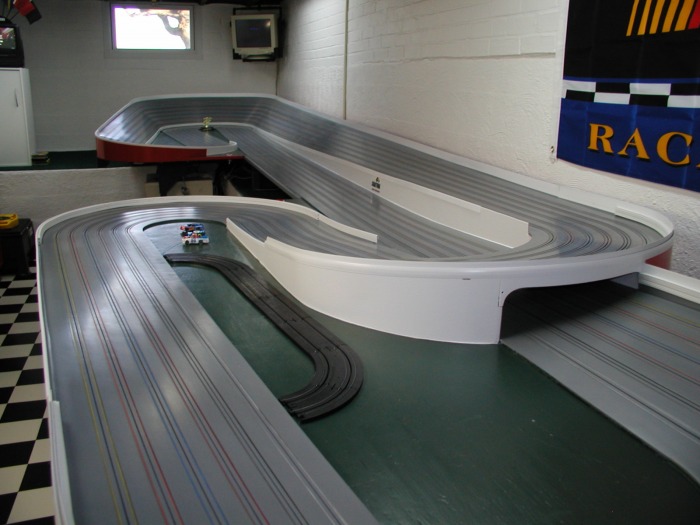
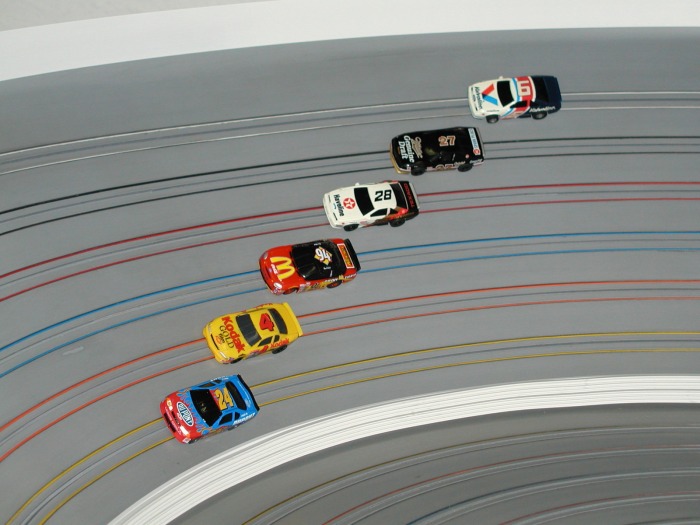
Sabatona: 55 Degrees of Speed!
Please check the 2006-2010 Sabatona section for completed pictures and information on Sabatona, and its upgrade in 2010.
